> For the complete documentation index, see [llms.txt](https://thirdeyegen.gitbook.io/developer-portal/llms.txt). Markdown versions of documentation pages are available by appending `.md` to page URLs; this page is available as [Markdown](https://thirdeyegen.gitbook.io/developer-portal/visioneye-slam-developement/getting-started-in-unity.md).
# Getting Started in Unity
To get started you will need:
* Unity 2019.4
* Our [UnityPackage](https://drive.google.com/file/d/1-wrsAxrTHDHPhrgVNZP34bKTIifKIksf/view?usp=sharing)
* A basic understanding of Unity 2019
* X2 with VisionEye SLAM Module
### Setting up Unity Development Environment
Open Unity and Create a new 3D project.

Go to top menu Assets -> Import Package -> Custom Package and Select the provided .unitypackage.
A import dialog will appear. It is important to select items present in the package and then import.
Navigate to Assets/Scenes/SampleScene and open the *example\_cube.unity scene.*
The scene should open and contain the objects below. There will be a Camera Rig a Colored Cube, a GameObject and a Directional Light.

**Please Note:** If you are moving the camera around the scene please move the Rig as a whole. Moving the camera's individually with result in problems displaying your app on the X2 Headset.
From here you can modify the scene with your desired models, scripts, etc. Next we will cover how to setup Unity to build an APK.
### Setting up Unity Build Settings for X2
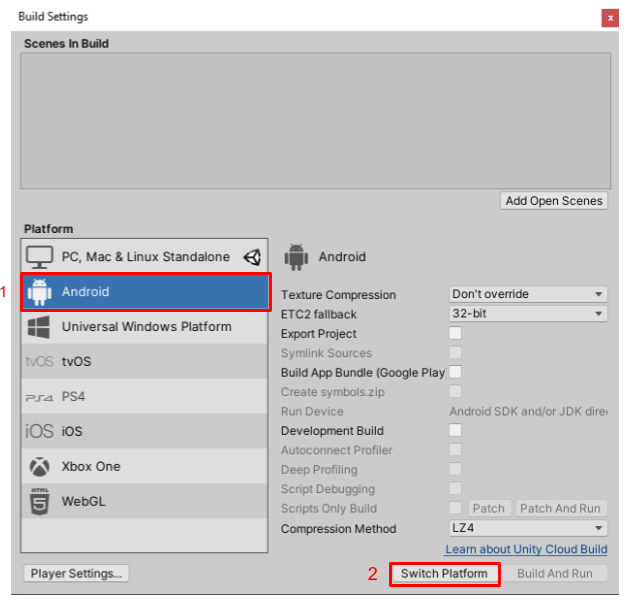
In the top menu go to File -> Build settings
The Build Setting window will open. Under platform, click on "Android" Then Click Switch Platform in the lower right of the window.
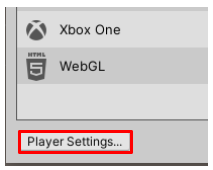
Click to the Player Settings button to open the player settings.
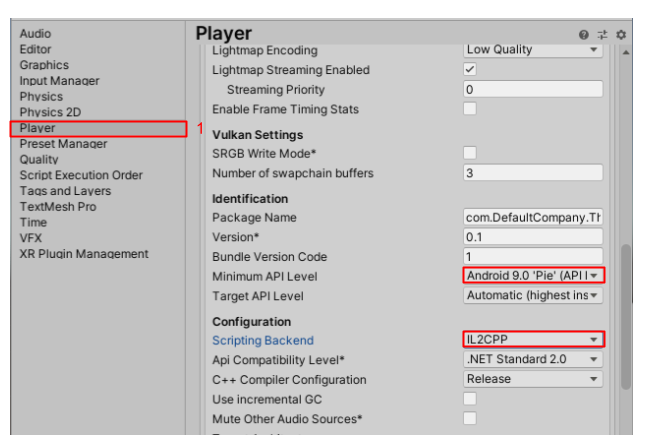
Click on Player then Find Minimum API Level and change it to Android 9.0 Change and set "Scripting Backend" to IL3CPP
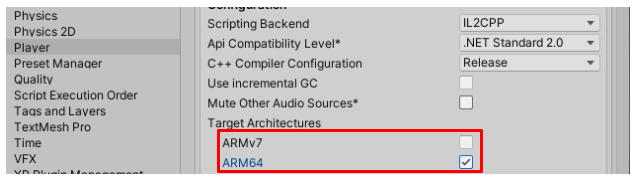
Further down in Player Settings, Uncheck ARMv7 and Check ARM64 under "Target Architecture"
Close Player Settings and Build Settings windows
With the X2 plugged in, You can now build the and run your application. You can build by Selecting File -> Build and Run
**Video covering the these topics:**
{% embed url="" %}
Our Video Getting Started Guide
{% endembed %}
**You can reference our slam API below:**
{% embed url="" %}